https://larougetdelisle.com/blogs/sewing-tips-resources.atom larougetdelisle - Sewing Tips & Resources 2023-10-03T11:07:24-07:00 larougetdelisle https://larougetdelisle.com/blogs/sewing-tips-resources/the-top-36-surprising-reasons-to-use-a-basting-stitch 2023-10-03T11:07:24-07:00 2023-10-10T11:17:01-07:00 The Top 36 Surprising Reasons To Use A Basting Stitch Cinnamon Miles The Basting Stitch is a versatile sewing method with lots of uses. While it may seem like a simple and insignificant step, the basting stitch can offer many surprising benefits. This article will explore the top 36 reasons to use a basting stitch in your sewing projects, providing valuable insights and tips to enhance your craft.

More

]]>

The Basting Stitch is a versatile sewing method with lots of uses. While it may seem like a simple and insignificant step, the basting stitch can offer many surprising benefits. This article will explore the top 36 reasons to use a basting stitch in your sewing projects, providing valuable insights and tips to enhance your craft.

The 36 Reasons To Use A Basting Stitch 

#1 Preparing for Gathering

One of the primary purposes of a basting stitch is to prepare the fabric for gathering. Before sewing, use a basting stitch to create even and controlled gathers, ensuring a professional and polished look. 


#2 Testing Fit and Adjustments 

A basting stitch allows you to test the fit of a garment before committing to a permanent seam. This is especially useful when sewing for dolls with unique body shapes and sizes, as it allows for easy adjustments without seam ripping.


#3 Securing Delicate Fabrics

When working with delicate fabrics such as silk or chiffon, a basting stitch can provide temporary stability, preventing the fabric from shifting or stretching during the sewing process.


#4 Easier Seam Matching

Basting the seams together before sewing allows you to easily match the edges and ensure a precise and seamless finish. This is particularly helpful when working with intricate patterns or small-scale projects. Learn how to work with striped fabrics in this in-depth tutorial.


#5 Facilitating Sleeve Attachment

Sewing sleeves can be challenging, especially when dealing with small-scale garments. A basting stitch along the sleeve cap seam allows easier attachment, ensuring a smooth and professional finish. 


#6 Creating Temporary Hems

A basting stitch can create a temporary hem when determining the ideal length for a doll's dress or skirt. This allows you to make adjustments without permanently altering the garment.


#7 Tacking Down Trims and Embellishments

If you add trims or embellishments, a basting stitch can temporarily secure them. This allows you to experiment with different placements and easily remove or adjust the trims. 


#8 Easier Zipper Installation

When sewing with zippers, a basting stitch can temporarily hold the zipper in place, making the installation process much easier and more precise. 


 #9 Creating Temporary Darts

Darts are essential for achieving a proper fit. Using a basting stitch to create temporary darts, you can easily adjust and fine-tune the fit before sewing the permanent seams. Looking for a pattern with darts? Try the Winner's Circle pattern from Karen Lorraine Designs.

#10 Preventing Fabric Shifting

When working with slippery or stretchy fabrics, a basting stitch can help prevent the fabric from shifting or stretching during the sewing process, ensuring more accurate and precise seams. Learn more about Sewing With Specialty Fabrics in Sewing With Cinnamon & Friends!

#11 Easier Lining Attachment

When sewing with linings, a basting stitch can temporarily attach the lining to the main fabric, making the assembly process easier and more efficient. 

#12 Creating Temporary Pleats

Pleats are a popular design element. Using a basting stitch to create temporary pleats, you can easily adjust and fine-tune the placement and size before sewing the permanent seams. See the Vintage Playsuit pattern hack.


#13 Easier Collar Attachment

Sewing collars can be challenging, especially when working with small-scale garments. A basting stitch along the collar seam allows easier attachment, ensuring a smooth and professional finish. Learn more about Sewing Tiny Collars in this Sewing With Cinnamon blog post with video, it's free to view!

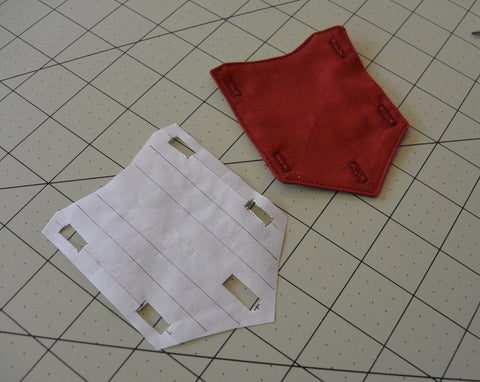
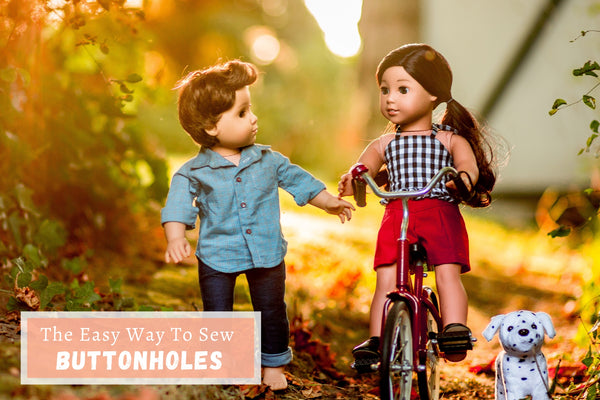
#14 Facilitating Button and Buttonhole Placement

When sewing with buttons and buttonholes, a basting stitch can temporarily mark the placement of the buttons and buttonholes, making the installation process much easier and more precise.

#15 Creating Temporary Tucks

Tucks are a popular design element in fashion. Using a basting stitch to create temporary tucks, you can easily adjust and fine-tune the placement and size before sewing the permanent seams.

#16 Easier Waistband Attachment

When sewing with waistbands, a basting stitch can temporarily hold the waistband in place, making the attachment process much easier and more precise. 

#17 Creating Temporary Gathers

how to secure ruffles with a basting stitch

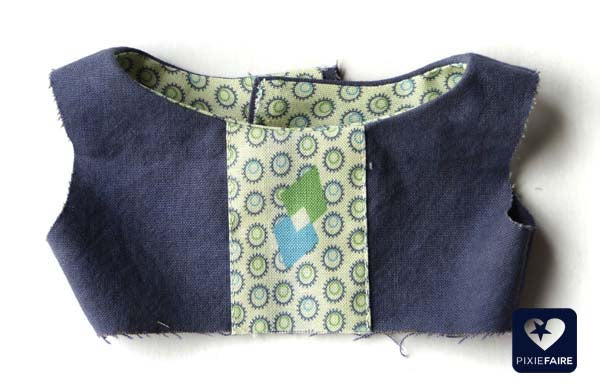
Whether you need to secure ruffles, Waistbands, waistlines, Sleeves, skirts, bodices, or necklines, using a basting stitch, you can easily adjust and fine-tune the placement and size of the element before sewing the permanent seams. 

#18 Easier Cuff Attachment

Sewing cuffs can be challenging, especially when working with small-scale garments. A basting stitch along the cuff seam allows for easier attachment, ensuring a smooth and professional finish. 

#19 Facilitating Appliqué Placement

When adding appliqués, a basting stitch can temporarily hold the appliqué in place, making the placement process much easier and more precise. 

#20 Creating Pockets

Pockets are a functional and stylish addition to any garment. Using a basting stitch to create temporary pockets, you can easily adjust and fine-tune the placement and size before sewing the permanent seams. 

#21 Easier Bias Tape Application

Bias tape is a versatile and practical finishing technique. A basting stitch can temporarily hold the bias tape, making the application process easier and more precise. 

#22 Facilitating Lining Hem Attachment

When sewing linings, a basting stitch can temporarily attach the lining hem to the main fabric, making the assembly process easier and more efficient.

#23 Creating Temporary Ruching

Ruching is a popular design element. Using a basting stitch to create temporary ruching, you can easily adjust and fine-tune the placement and size before sewing the permanent seams.

#24 Facilitating Elastic Installation

When sewing with elastic, a basting stitch can temporarily hold the elastic, making the installation process much easier and more precise.

#25 Easier Pintuck Alignment

Pintucks are a decorative and stylish feature. Using a basting stitch combined with a pintuck foot, you can easily create precise and even pintucks without the need for a double needle. The basting stitch helps to hold the fabric in place, allowing for more accurate stitching and ensuring that the pintucks are evenly spaced and aligned. 

#26 Easier Hemming

Hemming is an essential step in finishing a garment. A basting stitch is ideal for creating a curved hemline. Learn all about hemming techniques in this in-depth tutorial.

#27 Facilitating Lace Attachment

When adding lace to your garment, a basting stitch can temporarily hold the lace, making the attachment process much easier and more precise.

#28 Easier Casing Attachment

When sewing with casings, a basting stitch can temporarily hold the casing, making the attachment process much easier and more precise.

#29 Facilitating Ribbon Attachment

When adding ribbon to your clothes, a basting stitch can temporarily hold the ribbon, making the attachment process much easier and more precise.

#30 Creating Temporary Pleats for Collars

Collars are tricky to get installed correctly. Using a basting stitch to create temporary pleats, you can easily adjust and fine-tune the placement and size of the collars before sewing the permanent seams.

#31 Easier Cuff Hemming

Hemming cuffs can be challenging, especially when working with small-scale garments. A basting stitch can create a temporary hem, allowing you to adjust the length and ensure a professional finish.

#32 Easier Piping Hemming

Hemming piping can be challenging, especially when working with small-scale garments. A basting stitch can create a temporary hem, allowing you to adjust the length and ensure a professional finish.

#33 Facilitating Piping Installation

Piping is a great way to add a decorative touch. A basting stitch can temporarily hold the piping, making the installation process easier and more precise.

#34 Facilitating Lace Hemming

When hemming with lace, a basting stitch can create a temporary hem, allowing you to adjust the length and ensure a professional finish.

#35 Facilitating Zipper Hemming

Hemming zippers can be challenging, especially when working with small-scale garments. A basting stitch can create a temporary hem, allowing you to adjust the length and ensure a professional finish.

#36 Creating Temporary Gathers for Bodice Insets

Bodice insets are an important part of design. Using a basting stitch to create temporary gathers, you can easily adjust and fine-tune the placement and size of the bodice insets before sewing the permanent seams.

Conclusion

In conclusion, the basting stitch is a versatile and essential technique in sewing. From preparing for gathering to facilitating lace attachment, the basting stitch offers many surprising benefits that can enhance the quality and precision of your craft. By incorporating these uses for a basting stitch into your sewing projects, you can take your sewing to the next level and achieve professional and polished results. Keep Learning - check out our tutorial on How To Do Four Basic Hand Stitches.


]]>
https://larougetdelisle.com/blogs/sewing-tips-resources/how-to-sew-a-tiny-thread-loop-closure 2021-02-16T13:34:54-08:00 2021-02-16T13:34:54-08:00 How To Sew A Tiny Thread Loop Closure Cinnamon Miles Do you avoid designs with functional buttons and buttonholes because it is just too likley that your project will be destroyed? Fear no more, this tutorial will show you how to create dainty thread loop button closures!

More

]]>

Do you avoid designs with functional buttons and buttonholes because it is just too likley that your project will be destroyed? Fear no more, this tutorial will show you how to create dainty thread loop button closures! You could use this as an alternate closure style in place of buttonholes or zippers. Follow along to see how to make a tiny thread loop!

This exciting sewing tip is being shared with you as an excerpt from the full Sewing Simple Closures course. This course offers a variety of tutorials for adding things like hook and loop tape, buttons, buttonholes, thread loops, and fabric loops to your projects, if you haven't already checked it out I encourage you to take a peek and pick up a copy of the course today, or join the Sewing With Cinnamon community to view this content for free at any time. 

Now onto the tutorial... All you need is:

  • A garment with a finished opening, ready for a closure. (We're using the Lace Overlay Top in this video example.)
  • A hand sewing needle
  • Thread
  • A narrow dowel or pencil
  • A tiny button, we're using a 1/4" button.


That wasn't too bad, was it? Are you ready to try this out yourself? We have a bunch of designs that feature this type of closure, I encourage you to try one today!

Practicing this technique can help you approach sewing patterns that include tiny thread loops with confidence! Here are a few suggestions to get you started:


Thanks, everyone!

The larougetdelisle Team

]]>
https://larougetdelisle.com/blogs/sewing-tips-resources/how-to-turn-a-narrow-tube-the-bobby-pin-trick 2020-08-10T18:34:00-07:00 2020-08-10T18:34:39-07:00 How To Turn A Narrow Tube - The Bobby Pin Trick Cinnamon Miles Do you avoid designs with narrow spaghetti straps because the idea of turning the narrow tube is just too daunting? We have a super easy trick to share to take away that fear and open up the possibilities to sew up those darling designs! The secret is the use of a bobby pin - seriously, it works! After trying this you will have the confidence to turn narrow fabric tubes without fear!

More

]]>

Do you avoid designs with narrow spaghetti straps because the idea of turning the narrow tube is just too daunting? We have a super easy trick to share to take away that fear and open up the possibilities to sew up those darling designs! The secret is the use of a bobby pin - seriously, it works! After trying this you will have the confidence to turn narrow fabric tubes without fear!

BONUS - Limited Time Giveaway! This week We're giving away a $50 larougetdelisle Gift Card!

To enter the giveaway, be sure to scroll to the end of this post and leave a comment. Tell us what sewing challenge you'd like us to solve! Then be sure to follow this blog series to see when we post a "quick tips" solution!

This exciting sewing tip is being shared with you as an excerpt from the full Sewing Curves and Corners course. This course offers a full sew-along for the Liberty Jane Culotte Jumpsuit plus other tips for sewing curves and corners, if you haven't already checked it out I encourage you to take a peek and pick up a copy of the course today, or join the Sewing With Cinnamon community for more sewing tips, tricks, and community interaction.

Now onto the tutorial... All you need is a bobby pin and a 1" wide piece of woven cotton fabric to test this out. It can be any sewing project, it doesn't have to be just for dolls. This excerpt is demo-ing the strap pieces from the Culotte Jumpsuit pattern design.


Wasn't that amazing? Are you ready to try this out yourself? Here's is an additional step by step illustration (from the Culotte Jumpsuit pattern) of the whole process:

1. With RIGHT sides together, fold the strap in half lengthwise. Stitch with 1/4" seam allowance. Trim the seam allowance close to the stitching line.

2. Cut a small slit into the folded edge of the strap about 1/8" from the end. Slide a bobby pin onto the strap. Be sure the small section slides in between the bobby pin. Then feed the top back inside the tube.

3. Continue to push the bobby pin into the tube while pulling the fabric back over the end of the bobby pin.

4. Continue to slide the fabric back while pulling the bobby pin forward.

5. As the tube emerges, carefully slide the fabric all the way to the end.

6. Press the straps and use them with your desired project!


Applying this method can help you approach sewing patterns that include narrow spaghetti straps with confidence! Here are a few suggestions to get you started:


ENTER TO WIN A $50 larougetdelisle Gift Card!


To enter this week's contest, simply click the link below and then enter through the giveaway widget at the bottom of the blog post, there are many things you can do to earn multiple entry points!

Contest Details: You enter through the entry form that is embedded on this page and appears just below this paragraph, if you don't see it, be sure to visit the page from your desktop or an alternate browser such as Google Chrome. It may not appear on all mobile devices. The complete rules and entry details appear on the entry form. This is not a comment contest - in other words, leaving a comment on the bottom of this page is not an official entry method. The only required entry method is to leave a comment under this post and then confirm that you did it in the contest widget. One person will receive the PF Gift Card. You can enter once, or gain multiple entries by completing the other entry methods and increase your chances of winning. Please review all Terms and Conditions on the giveaway page before entering. While we wish we could run this contest everywhere, for legal reasons it is only open to eligible residents of the U.S. and Canada, not including Rhode Island. This contest is exclusively endorsed by Liberty Jane Clothing and larougetdelisle. 

a Rafflecopter giveaway


We'd love to hear from you. Leave a comment and tell us - what sewing challenge you'd like us to solve! Then be sure to follow this blog series to see when we post a "quick tips" solution!

Commenting below and confirming your entry in the widget above gives you one entry method, the other methods are listed in the widget above, be sure to enter in as many ways as you can to receive the maximum amount of entries to win one PF Gift Card!

Thanks, everyone!

The larougetdelisle Team

]]>
https://larougetdelisle.com/blogs/sewing-tips-resources/how-to-sew-a-hem-on-knit-fabrics-the-coffee-filter-trick 2020-08-03T18:00:11-07:00 2022-08-08T07:20:45-07:00 How To Sew A Hem On Knit Fabrics - The Coffee Filter Trick Cinnamon Miles Do you have a fear of sewing hems on knit fabrics? Don't fret, many of us do too! In this post, I'm excited to share with you a quick and easy tip to sewing a hemline on knits with no stress at all! The secret is the use of a coffee filter as a stabilizer - seriously, it works! After trying this, I'm pretty sure you'll never go back to your old method and you will have the confidence to sew knits without fear! 

More

]]>

Do you have a fear of sewing hems on knit fabrics? Don't fret, many of us do too! In this post, I'm excited to share with you a quick and easy tip to sewing a hemline on knits with no stress at all! The secret is the use of a coffee filter as a stabilizer - seriously, it works! After trying this, I'm pretty sure you'll never go back to your old method and you will have the confidence to sew knits without fear! 


This exciting sewing tip is being shared with you as an excerpt from the full Sewing With Knits MasterClass course. This is one of our most popular courses, if you haven't already checked it out I encourage you to take a peek and pick up a copy of the course today, or join the Sewing With Cinnamon community for more sewing tips, tricks, and community interaction.

Now onto the tutorial... All you need is a plain coffee filter (white or natural) and a knit fabric project to test this out. It can be any sewing project, it doesn't have to be just for dolls. Although, if it's larger than the coffee filter, you'll probably need several to get the job done!


Wasn't that amazing? Are you ready to try this out yourself?


Applying this method can help you approach sewing patterns designed for knit fabrics with confidence! Be sure to check out our Summertime Styles With Knit Fabrics to see more patterns where you can apply your new skills! Here are a few suggestions to get you started:


We'd love to hear from you. Leave a comment and tell us - your favorite "Sewing With Knits tip" or share with us your biggest Sewing With Knits challenge! 

Commenting below and confirming your entry in the widget above gives you one entry method, the other methods are listed in the widget above, be sure to enter in as many ways as you can to receive the maximum amount of entries to win one PF Gift Card!

Thanks, everyone!

The larougetdelisle Team

]]>
https://larougetdelisle.com/blogs/sewing-tips-resources/the-easy-way-to-sew-machine-buttonholes-freezer-paper 2020-05-25T14:29:00-07:00 2020-05-25T14:36:22-07:00 The Easy Way to Sew Machine Buttonholes- Freezer Paper! Cinnamon Miles This week we have a fun treat! Shari Fuller, the designer behind the Thimbles and Acorns brand, is going to share her amazingly cool buttonhole sewing tip with us! After trying this, I'm pretty sure you'll never go back to your old method - seriously! My hope is that you will walk away with the confidence to sew professional looking buttonholes!

More

]]>
Sewing Easy Machine Buttonholes Using the Freezer Paper Method

This week we have a fun treat! Shari Fuller, the designer behind the Thimbles and Acorns brand, is going to share her amazingly cool buttonhole sewing tip with us! After trying this, I'm pretty sure you'll never go back to your old method - seriously! My hope is that you will walk away with the confidence to sew professional looking buttonholes!

Limited Time  Giveaway! We're giving away a $50 larougetdelisle Gift Card!

To enter the giveaway, be sure to scroll to the end of this post and leave a comment. Tell us- would you rather sew buttons and buttonholes or sew a zipper?

Sewing Easy Machine Buttonholes Using the Freezer Paper Method

But first... If you're new to sewing buttonholes with an automatic buttonhole foot attachment on your sewing machine, be sure to check out my Simple Closures Video from the Sewing Academy series, it includes a full tutorial showing how to install and use a button hole foot. I also demonstrate how to open up the buttonhole successfully without accidentally cutting through the threads.

Now on to the tutorial from Shari Fuller!  

Sewing Easy Machine Buttonholes Using the Freezer Paper Method

Watch the Freezer Paper Buttonhole video below: 

Or follow along with the full tutorial here:

For many sewers, the thought of adding buttonholes to a finished outfit is enough to send chills down their spine… it does for me.  The thing is, it isn’t terribly difficult to make buttonholes, especially if your machine has a one-step buttonhole feature.  The problem is more about placement.  A slightly crooked or offset buttonhole can ruin the finished look of an otherwise masterfully sewn outfit… and it is nearly impossible to remove a buttonhole without damaging the fabric.

The key to beautiful buttonholes is to carefully mark all your placement lines so you can get them right the first time.  Transferring markings directly onto fabric, however, isn’t always as easy as it seems… which is probably why we are tempted to take shortcuts we inevitably regret.  Markings can be difficult to see on dark or printed fabrics, and it can be difficult to remove markings from lighter fabrics.  This is where the freezer paper comes in, the white paper is easy to write on and easy to see, and when you are finished, you just peel it off without a trace!

To begin, gather your project, freezer paper, buttonhole foot, pen, ruler, scissors, rotary cutter (optional), and an iron.

1. Measure the width of your buttonhole foot.

2. Cut a strip of freezer paper the same width as your buttonhole foot.

3. Draw a line down the center of the strip of freezer paper.

4. On a scrap piece of fabric, make a sample buttonhole that fits the buttons you will be using in your project.

5. Measure the length of your sample buttonhole.

6. Using the measurement of your sample buttonhole, determine the buttonhole placement on your project and transfer the placement marking to the center line on your strip of freezer paper. The top of the strip should line up with the top edge of your project. Don’t forget to figure in the seam allowance when determining the placement of the first buttonhole.

Tip: For doll clothes, I like the top button to be 1/4-inch from the finished edge, so the marking for the top buttonhole should be 1/2-inch from the top of the freezer paper to allow for the 1/4-inch seam allowance.

7. Fold the freezer paper strip in half along the center line. Trim the excess length of the bottom, leaving about 3-inches to help center the template under the buttonhole foot.

8. Snip the ends of each buttonhole marking 1/8-inch in from the folded edge…

… then snip out the center of each buttonhole.

Your finished template will look like this.

9. With the plastic side down, position the freezer paper template on you project. The top edge of the template should match the top edge of the project. Use the center line of the freezer paper to help with the alignment. Press the freezer paper so that it adheres to your project.

If you are unsatisfied with the alignment, simply peel the freezer paper up, reposition it, and press it in place again.

10. Starting with the bottom buttonhole, position the template so that the needle lands at the bottom edge of the buttonhole opening. Adjust the template so that the side edges are aligned with your buttonhole foot and the center line runs down the center of the buttonhole foot. Stitch your buttonhole. Repeat this process for the rest of the buttonhole, working from the bottom up.

When you are finished, peel the freezer paper template from your project. If you are careful not to tear it, you can reuse this template several times.

Look, beautiful, straight, and even buttonholes! (…though, I wouldn’t suggest using white thread on read fabric)

While this tutorial demonstrates how to make a template for simple vertical buttonholes, the concept can also be used for horizontal and arbitrarily placed buttonholes as well. Instead of cutting a strip the same width as your buttonhole foot, cut a wider strip or template that will accommodate the buttonhole placement and draw guidelines on the freezer paper for your buttonhole foot.

 Thanks, Shari! This is a fantastic resource!

Applying this method can help you approach sewing patterns with functioning buttons with confidence! Be sure to check out our Buttons and Bows Collection to see more patterns where you can apply your new buttonhole skills!

PDF Sewing Pattern George Washington's Uniform For 18-inch dolls PDF Sewing Pattern Button Up shirt For 18-inch dolls PDF Sewing Pattern Annie Ruffle Dress For18-inch dolls

Sewing Easy Machine Buttonholes Using the Freezer Paper Method

ENTER TO WIN A $50 larougetdelisle Gift Card!

To enter this week's contest, simply click the link below and then enter through the giveaway widget at the bottom of the blog post, there are many things you can do to earn multiple entry points!

Contest Details: You enter through the entry form that is embedded on this page and appears just below this paragraph, if you don't see it, be sure to visit the page from your desktop or an alternate browser such as Google Chrome. It may not appear on all mobile devices. The complete rules and entry details appear on the entry form. This is not a comment contest - in other words, leaving a comment on the bottom of this page is not an official entry method. The only required entry method is to leave a comment under this post and then confirm that you did it in the contest widget. One person will receive the PF Gift Card. You can enter once, or gain multiple entries by completing the other entry methods and increase your chances of winning. Please review all Terms and Conditions on the giveaway page before entering. While we wish we could run this contest everywhere, for legal reasons it is only open to eligible residents of the U.S. and Canada, not including Rhode Island. This contest is exclusively endorsed by Liberty Jane Clothing and larougetdelisle. 

a Rafflecopter giveaway

We'd love to hear from you. Leave a comment and tell us -would you rather sew buttons and buttonholes or sew a zipper? Commenting below and confirming your entry in the widget above gives you one entry method, the other methods are listed in the widget above, be sure to enter in as many ways as you can to receive the maximum amount of entries to win one PF Gift Card!

Thanks, everyone!

The larougetdelisle Team

]]>
https://larougetdelisle.com/blogs/sewing-tips-resources/14862989-mitered-corners 2014-07-30T08:00:43-07:00 2014-07-30T08:00:43-07:00 Mitered Corners Melinda Schlimmer

Have you ever hemmed a piece of fabric on multiple sides, and wondered if there was a better way to make those corners look good? Mitering your corners is surprisingly fast, and the results are well worth the effort. 

More

]]>

Have you ever tried to hem multiple edges of the same piece of fabric, and wound up with really nasty looking corners? Well, today, I wanted to show you how to miter your corners. It actually doesn't take that much longer, and the results are beautiful!

Start by marking off your hem allowance on each corner. 

Then, mark a third line 1/4" away from the point, at a 45 degree angle to the corner lines. 

Cut along this third, marked line; then press the raw edge under 1/4". 

Now, fold under your raw edges just like normal...and watch what happens at the corners! If you are careful, you should wind up with something like this: 

Congratulations! You just mitered a corner! Yes, that's really all there is to it.

Thanks for following along today! If you have questions or comments, please feel free to jump in below -- we'd love to hear from you :) 

For larougetdelisle,
Melinda

]]>
https://larougetdelisle.com/blogs/sewing-tips-resources/14862921-hong-kong-finish 2014-07-16T09:57:00-07:00 2014-07-16T09:57:24-07:00 Hong Kong Finish Melinda Schlimmer

Add this couture edge finish to your box of tricks and techniques -- it's actually very easy, and the results are amazing!

More

]]>

This week, I show you how to do a fairly easy, couture edge finish -- basically, you bind the raw edges of your seam allowance using bias strips. 

All you need is some fabric to finish, and a few strips of bias.

It's important to use bias for this technique for several reasons. First, cutting the fabric on the bias (or, 45 degrees from the straight grain) gives it greater flexibility. Bias also doesn't fray, which is a plus since this technique leaves one edge of the binding unfinished on the back of the seam allowance.

OK, enough fabric education -- let's get binding!

Lay a 1" wide strip of bias over your edge to be finished. Stitch along the edge at 1/4" seam allowance.

Then, press the strip away from the fabric, and wrap it around to the back. The key word here is wrap, you don't want to make extra bulk for yourself by folding up the seam allowance underneath the binding. (You can trim the seam allowance down if you need to.)

The binding should overlap your first line of stitching by about 3/16" or so; pin it down, and then from the right side, machine-stitch next to the original binding seam. Ta da!

You can do a hong-kong finish on curved edges, like this one:

(Getting a smooth curve is much easier if you pre-press the bias strip into shape.) 

You can also substitute strips of tulle for the bias strips; this is especially handy for binding delicate fabrics, like lace or chiffons.

Or, if the binding fabric you want to use is really lightweight, and you don't want to have a raw edge on the backside, you can cut a wider strip of bias, fold it in half, and then proceed as normal. Just make sure the folded edge is the one you wrap to the back. :) 

And that's it! 

Do you have a favorite way of finishing edges? Have you ever used a hong-kong finish? Let us know in the comments, we'd love to hear from you!

Thanks for following along today!

For larougetdelisle,
Melinda

]]>
https://larougetdelisle.com/blogs/sewing-tips-resources/14759741-continuous-lap-placket 2014-07-02T20:27:00-07:00 2014-07-02T20:30:10-07:00 Continuous Lap Placket Melinda Schlimmer

Ever wonder how to finish a slit edge in a garment? Well, look no further -- a continuous lap placket is an easy way to do just that, plus it provides a great place to anchor closures like hooks and eyes or snaps!

More

]]>

Ever wonder how to finish the edge of a slit, like the ones in a sleeve just above a cuff? Well, the Continuous Lap Placket may just be your next best friend! So called because it laps around in one continuous line, this super useful bit of sewing know-how is fabulous for finishing slit edges, while also giving you a place to anchor hooks and eyes or other small closures. 

Start by marking off the length of your slit, and carefully cutting along the line you marked. (If your fabric is delicate or likes to fray, you may want to staystitch about 1/8" away from your marked line on either side, before cutting...)

Cut a strip of fabric at least twice as long as your slit, to be the placket. A 1" wide strip will give you a 1/4" placket, which is great for sleeves, but you'll probably want to cut a much wider strip if you're adding a placket to a skirt. 

Press under one long edge of the strip, 1/4". Pin it along the slit, carefully opening the slit up as you go. The raw edges should line up everywhere BUT at the point -- which is fine and as it should be! The fashion fabric has to dip a bit lower at the point of the slit, to avoid giving you weird puckers. Just make sure that the point doesn't dip down below your stitch line. 

Stitch 1/4" away from the raw edge of the placket fabric. You can see the stitchline pretty clearly in the picture below -- try to just skim across the very point of the fashion fabric, just enough to catch it but not so deep you get puckers. 

Press the placket fabric up, away from the fashion fabric, and fold it over the raw edge. 

Stitch the edge of the placket down, enclosing the raw edges. You can do this by hand or by machine -- I machined it here for clarity, but I think hand-stitching gives the nicest results. :)

As a final step, stitch across the very top of your placket, right at the fold, at a 45 degree angle. This helps reinforce the point of the slit, and gives your placket a nice finished look. Press the placket so that one side folds under, and the other side extends. Congratulations!

Thanks for following along today, everyone! Have fun with this, and let us know in the comments how you use this most fabulous of plackets in your own work!


For larougetdelisle,
Melinda

]]>
https://larougetdelisle.com/blogs/sewing-tips-resources/14529649-how-to-sew-patch-pockets 2014-06-18T20:53:00-07:00 2014-06-18T20:53:47-07:00 How to Sew Patch Pockets Melinda Schlimmer

Patch pockets: a simple, versatile way to add stuff-carrying capabilities to most garments. Follow along as I show you how to make two kinds of these hardworking pockets!

More

]]>

This week, I show you how to add a simple pocket to most anything! Patch pockets are ridiculously easy and versatile -- they're great for adding a pop of color (and functionality) to pants, skirts, shirts, and many other items. Today, we'll make two kinds of patch pockets; a quintessential patch pocket, and a novelty shaped pocket.


1. The Basic Patch Pocket

Figure out how large you'd like your pocket to be, then cut a rectangle of fabric that's 1/4" larger on the bottom and sides, and 1/2" longer along the top edge.

Press under the top edge twice, so that you have a 1/4" double turn hem. Then, edgestitch close to the folded edge to hold it down.

Press under the remaining three edges 1/4". Position your pocket, and pin it into place.

Edgestitch around the outer edges to finish.

If your pocket is going to get a lot of use, it's a good idea to reinforce the corners. Here's a little diagram that shows you how to stitch little reinforcing triangles at each upper edge of the pocket...


2. The Novelty Shaped Patch Pocket

But, you say, what about when you inevitably get bored of the basic, rectangular pocket? What if you want to try other shapes? Well, here's one way to get randomly (and delightfully) shaped patch pockets.

Cut out two identical pieces of fabric, in your desired shape -- be sure you add about 1/4" of seam allowance on all the edges. Lay the two pieces atop each other, with the right sides together, and stitch. Leave an opening at least 1" long somewhere near the bottom.

Clip into the seam allowance (curious? We give a few hints in this post) and turn your pocket right side out. Press it carefully, being sure to fold in the edges of the opening.

Then, all that's left is to place your pocket and edgestitch it down. Of course, where to start and stop stitching won't always be clear with this kind of pocket; the rules of thumb here are to make sure 1) your object can still fit into the pocket and 2) the stitching comes up high enough that the object won't fall out of the pocket :)


And there you have it! Congratulations!


Do you have other fabulous ways of making patch pockets? Leave us a comment below and let us know :)

Thanks everyone!
For larougetdelisle,
Melinda


]]>
https://larougetdelisle.com/blogs/sewing-tips-resources/14397821-two-basic-casings 2014-06-05T07:52:00-07:00 2014-06-05T07:52:28-07:00 Two Basic Casings Melinda Schlimmer

A casing is quite simply a tunnel in the fabric for elastic or ribbon; join us as we show you how to make casings in two different, easy ways!

More

]]>

Today I wanted to show you two easy ways to make casings (which is just a fancy sewing word for a tunnel in the fabric!)

1. Edge Casings

When you just need to run some elastic around the edge of a piece, what do you do? Why, make an edge casing, of course! In this example, I'm making a super-quick doll skirt; I have the bottom edge hemmed, but haven't sewn the edge casing for the elastic yet. Here's how:

Press under the raw edges of your fabric twice -- in this case, 1/4" and then 3/8", to leave enough room for a 1/4" piece of elastic -- and then pin it down.


Stitch close to the fold, and voila! your casing! Thread elastic through, stitch down both ends, and you're in business. If you want to get fancy, you can mark your fold lines before pressing them under (like I did in the first picture) -- that's best for days when you want to be really precise.


2. Applied Casing

This is as simple as the name sounds -- it's a casing which you apply to the fabric. You can use pre-made bias tape, to make the job really easy; I just cut a strip of self fabric and pressed the raw edges under. Either way works great. :)

Simply pin your casing down on the fabric in the desired location, and edgestitch to finish. Be sure there is enough room between your stitch lines for your elastic or ribbon.

Now, would you like to add an opening in your casing? Say you are putting a casing around the waist of a dress, and need a spot for the ribbon to emerge so you can tie it? No problem!

Just cut the casing at the right length, tuck under the raw ends, and pin two folded ends next to each other so that they just touch. Sew normally; then, use the new opening you just made to thread your ribbon through.


Thanks for following along today! How do you use casings? Let us know in the comments below :)

For team larougetdelisle,

Melinda


]]>
https://larougetdelisle.com/blogs/sewing-tips-resources/14211157-how-to-do-four-basic-hand-stitches 2014-05-21T14:37:00-07:00 2014-05-21T14:40:54-07:00 How to do Four Basic Hand stitches Melinda Schlimmer

Learn about these four essential hand-sewing stitches, what they're used for, and how to do them!

More

]]>

Today I  wanted to show you four very basic, super useful, hand stitches -- they are all a must for any serious stitcher!


1. The Running Stitch.

This is probably the simplest hand stitch you'll ever do. I usually use it for basting layers of slippery fabric together, but if you do it small enough, you can also use it for gathering.

Bring your needle up from the wrong side, and then put it back down again a little ways away. That's it! Keep going until you've stitched as far as you'd like, then knot your thread on the wrong side.


2. The Backstitch.

This hard-working, long-wearing stitch is probably the sturdiest hand-stitch out there. It's great for hand-sewing permanent seams -- or for reinforcing potential trouble spots. And, I've heard that it is favored among couturiers and bespoke tailors for its strength and flexibility.

Bring your needle up to the right side of the fabric, slightly in front of the start of the seam. Then, put your needle through the fabric, behind where it came up, and bring it up again a stitch length in front. This backwards motion is what gives the stitch its name. Keep working the stitch until you've reached the end of the seam; knot your thread, and admire a job well done!


3. The Whipstitch.

Usually used to join two layers of fabric together at the edges, or for quickly attaching linings, shoulder pads, and a whole host of other random pieces. It can even be used as an edge finish -- just whip over the raw edge, and you're done!

Bring your needle up to the right side of the fabric, then take a large bite out of the underlayer before bringing the needle up again, a little ways away. Pull thread through, and repeat.


4. The Slipstitch.

I like to think of this stitch as the whip stitch's older, more sophisticated sibling. The principle is the same, but all of the points where the thread goes through the fabric are much smaller. This means the slipstitch is basically invisible, and thus a great choice for hand-sewn hems. It does take a little longer to stitch, however.

Bring your thread to the right side, very close to the folded edge.  Catch just a few threads of the underlayer, before taking a tiny bite out of the folded edge. The finished stitch should move mostly horizontally, with very little vertical motion at all.

To help clarify the difference between the whip stitch and the slipstitch, here's a back view:

See how much more visible the whipstitch is? That's totally fine in some applications, but when you need a basically invisible stitch, the slipstitch is the way to go.

Thanks for following along today! Do you use any of these stitches? Which is your favorite, and how do you use it?

For larougetdelisle,

Melinda

]]>
https://larougetdelisle.com/blogs/sewing-tips-resources/14062977-hand-sewn-bar-tacks 2014-05-07T20:41:00-07:00 2014-05-07T20:41:54-07:00 Hand-sewn Bar Tacks Melinda Schlimmer

Follow along with this quick tutorial to learn what a bar tack is, and how to make two different varieties!

More

]]>

This week, I wanted to show you how to make bar tacks. These little thread wonders are pretty quick to work up, and they're fabulous for holding two layers of fabric near each other, while still allowing them some room for movement. (You can usually find them holding linings in place, but they also work great to hold down troublesome collar points, or even make thread belt loops!)

For this demo, I'm using heavy duty perle cotton, to make it easier to see -- but in most cases, a normal weight sewing thread will do quite nicely...especially if you wax it first!


First, let's make a heavy-duty bar tack; use it to join thick fabrics together, or when you need a bit more heft. 

Start by stitching between the two layers of fabric a couple times, leaving some slack. This distance is the finished length of your bar tack.

Then, work  a buttonhole stitch around the threads -- whip around the thread skeleton, then run your needle back through the loop you just formed. 

Keep going until you've covered the entire length of thread with buttonhole stitches. When you reach the end, tie a knot and trim off your thread. 


But what about for lighter-weight fabrics, you say? In that case, a thread crochet chain might be just what you need! It's much lighter weight, and also a little quicker to do. 

Knot your thread, and stitch a little "x" into one piece of fabric to anchor it. Before you draw the last stitch tight, reach through the loop, and pull another thread loop through. 

Pull the second loop so that the first loop closes; then, reach through the second loop and make a third...and keep going!

When your crochet chain is as long as you need, run your needle through the final loop and pull it tight; this will finish the chain and keep it from unraveling. 

Take a few stitches in the other piece of fabric, and tie off your thread. Congratulations! You've got a bar tack!

Thanks for following along today! How do you use bar tacks? Leave us a comment, and let us know!

For larougetdelisle,
Melinda

]]>
https://larougetdelisle.com/blogs/sewing-tips-resources/13854393-how-to-sew-on-buttons 2014-04-23T21:00:02-07:00 2014-04-23T21:00:02-07:00 How to sew on Buttons Melinda Schlimmer

Sewing on a button is a super easy, basic life skill -- follow along with this simple tutorial to add this valuable skill to your toolbox!

More

]]>

Do you know how to sew on a button? This is one of the most basic, useful life skills you can have -- and trust me, it isn't rocket science! :) 

In this tutorial, I'll show you how to sew on three different kinds of buttons: standard, flat buttons; shanked buttons; and finally, how to add a thread shank to a flat button.

The supplies you need are super basic: a needle and thread, a button, and (of course) some fabric to sew it to! If you want to make a thread shank for your button, you'll also need a matchstick or toothpick.


1. The Basic Button 

Thread your needle, and tie a knot at one end. Bring your needle up through the fabric, then sew through one of the holes in the button. Lay the button flat against the fabric, being sure to place it where you want it, and sew down through another hole. (Like I said, this stuff is really complicated!!)

Sew through that same set of holes a couple times, then switch and sew through the other holes. If the button will be getting a lot of use, you should probably sew through each hole 6-8 times; otherwise, 4-5 times should hold it down quite nicely.


2. The Shanked Button

Next, let's talk shanks. A shank is a loop on the back of a button, that holds it up from the surface of the fabric. This is great when your button has to go through some thick material -- or for when you don't want a button with holes on the face. 

Sewing on a shanked button is almost exactly the same as a flat button. Thread a needle, knot one end, and bring the thread up to the right side of the fabric. Then, run your needle through the shank. Take a tiny "bite" out of the fabric, and pull your thread tight. 

Keep stitching in this way (shank, bite of fabric, shank, bite of fabric...) until you've been around a half dozen times, and your button is secure. Run your thread to the backside of the fabric, and tie it off.

But, what about when you have to use a flat button, but need it to stand away from the fabric? Sounds like it's time for a thread shank!


3. Adding a Thread Shank

Start sewing this button just like you would a standard flat button -- but before you pull that first stitch tight, slip a matchstick or toothpick between the button and the loop of thread. Pretend the matchstick is just part of the button, and sew around it a half dozen times or so. When the button feels secure, sneak your needle up between the fabric and the button.

Next, wiggle the matchstick out, and pull the button up away from the fabric. Wrap the remaining thread around the little bits of thread between the button and the fabric, then tie your thread off. Ta-da -- you've just made a thread shank!


Thanks for following along today! Do you have a favorite button story? We'd love to hear it!

For larougetdelisle,
Melinda

]]>
https://larougetdelisle.com/blogs/sewing-tips-resources/13557981-clipping-101-basic-clipping-skills 2014-04-11T07:59:31-07:00 2014-04-13T14:36:52-07:00 Clipping 101: Basic Clipping Skills Melinda Schlimmer

Clipping your seam allowances is one of the easiest ways to make your sewing more professional! In this tutorial, I show you three techniques the pros use to clip seam allowances. 

More

]]>

Clipping is one of the simplest, easiest ways to take your sewing up to the next level of professionalism! Sadly, it's often overlooked, or given a very brief explanation. So, today I wanted to show you three professional clipping techniques. 


Before we get too far, here's a quick definition: clipping is simply any cut into the seam allowances, resulting in a flatter seam. Now...get your scissors, and let's get clipping!


Lesson 1: Clipping concave curves

This neckline is a great example of a concave curve, or a curve that goes inward. You can also find concave curves in princess seams, facings, and armholes. 

I've sewn a little tiny facing to this neckline. It's not an extreme curve, but you can already tell if I were to just turn it right side out, there would be some serious puckering on the right side. Nothing says sloppy sewing like a puckery seam!

Here, you can see the correct clipping technique for concave curves: tiny little slits, cut in the seam allowance, just up to the seamline (but not past!) The more extreme the curve, the more slits you'll need.

Look at how pretty that clipped, pressed seam is!


Lesson 2: Clipping Convex Curves

For this example, I've sewn up a little half collar. Its outer edge is a convex curve -- because the seam allowance is wider than the inside of the collar, the seam allowance wants to buckle up on itself. 

So, you have to remove some of the seam allowance by cutting little notches. The black triangles below mark good places to clip out notches.

The result? A professional-quality, smooth curve!

Lesson 3: Grading Bulky Seams

Grading is a little different, but it also helps your finished seam lie flatter. Any time you have lots of layers coming together, it's a good idea to cut your seam allowances to differing lengths -- to grade them. Essentially, you want a stair-step look to your seam allowances.

This example shows a two-layer skirt, gathered onto a bodice piece, with a binding strip! That's four layers, and some of them are even gathered... Trimming them to different lengths will keep the seam from becoming a lump in your garment, while still preserving the strength of the seam.

To grade all the layers at once, turn your scissors at an angle; clip the top seam allowance rather short (leave just enough that it won't pull out of the seam), then clip the next layers a bit taller, and leave the lowest layer longest of all.

Now, when you press and stitch the binding up, you have a much less bulky seam. (And yes, it can be just as sturdy as if you'd left on all the seam allowance!)


Congratulations! You've finished Clipping 101! 


Have you been clipping for years? Or is this all new to you? I'd love to hear about your adventures in clipping, in the comments...


--Melinda

]]>
https://larougetdelisle.com/blogs/sewing-tips-resources/13205545-basic-french-seam-tutorial 2014-03-28T11:47:00-07:00 2014-06-20T23:23:32-07:00 Basic French Seam tutorial Melinda Schlimmer

Take your sewing skills up a notch with this basic couture technique! French seams make for a beautiful finished edge on the inside of your garment. 

More

]]>

French seams truly are fabulous. Originally from couture, they're fairly widespread amongst the sewing community -- and for good reason! They wrap the raw seam allowances in fabric, creating a smooth, beautiful finish on the inside of your project. And they aren't nearly as hard as they look!

For this tutorial, I'm using scraps of fabric with a 1/2" seam allowance. You can adapt this technique for almost any seam allowance size, but you will need at least 3/8" to work with. So, if you are using a pattern that has 1/4" seam allowances, like most doll clothes patterns do, just add an extra 1/4" to the edges you'd like to french seam. While you can adapt it to curved seams, straight seams usually yield the best results. 

Start by pinning your two pieces of fabric together, RIGHT SIDES OUT. This is totally backwards from normal sewing, so just take a deep breath and keep going!

Sew your first pass at 1/4", then trim the seam down to 1/8". 

Next, press the seam open, and refold the fabric around the seam allowances. Now the WRONG sides should be out, and the right sides should be together, like normal.  Press this new fold flat, being careful to keep the seam at the very edge of the fold.

Pin along your new, folded edge, and stitch again, this time at 1/4". Notice how we've finally used up all of our original 1/2" seam allowance?

Open out your fabric one more time, and press the french seam to one side. Congratulations! You have now officially completed a french seam! 

And from the right side -- who would guess such a beautiful seam lurked beneath? :)

For larougetdelisle,
Melinda

]]>
https://larougetdelisle.com/blogs/sewing-tips-resources/10504497-sew-along-understanding-your-sewing-machine 2013-11-29T20:14:49-08:00 2014-04-13T15:20:46-07:00 Sew Along: Understanding Your Sewing Machine Cinnamon Miles HI! I'm Cinnamon, from Liberty Jane Clothing. Follow along as I show you how to use a sewing machine. Got sewing questions? Ask them in the comments, I'll try to answer them in upcomming videos :)

More

]]>
 

HI! I'm Cinnamon, from Liberty Jane Clothing. Follow along as I show you how to use a sewing machine. Got sewing questions? Ask them in the comments, I'll try to answer them in upcomming videos :)
Looking for the Sewing Book that I wrote? Click Here: https://larougetdelisle.com/Idiots-Guides-Sewing-Cinnamon-Miles/dp/1615644113/ref=la_B00AY820NS_1_2?s=books&ie=UTF8&qid=1385255776&sr=1-2
Find Liberty Jane Brand Patterns at larougetdelisle: https://larougetdelisle.com/collections/liberty-jane
Check out my website: https://larougetdelisle.com/
]]>
https://larougetdelisle.com/blogs/sewing-tips-resources/10242585-sew-along-how-to-sew-the-trendy-t-shirt 2013-11-18T16:05:58-08:00 2013-11-18T16:18:48-08:00 Sew Along: How-To Sew the Trendy T-shirt Cinnamon Miles Now that you've got the t-shrt pattern cut out, now you are ready to start sewing! Follow along as Melinda shows you how to sew the LJ Trendy Tee!


]]>
https://larougetdelisle.com/blogs/sewing-tips-resources/10241881-sew-along-how-to-cut-out-the-trendy-t-shirt-pattern 2013-11-18T15:31:37-08:00 2014-04-13T15:42:24-07:00 Sew Along: How To Cut Out the Trendy T-Shirt Pattern Cinnamon Miles Follow along as Melinda from Liberty Jane shows you how to cut out the trendy t-shirt pattern.

More

]]>
Follow along as Melinda from Liberty Jane shows you how to cut out the trendy t-shirt pattern.


]]>
https://larougetdelisle.com/blogs/sewing-tips-resources/8848263-learn-to-sew-with-cinnamons-new-basic-sewing-book 2013-08-29T12:37:17-07:00 2013-11-18T15:49:12-08:00 Learn To Sew with Cinnamon's New Basic Sewing Book! Cinnamon Miles Are you new to sewing? Do you need to learn the basics? Do you want to see what is being taught with clear color photo's? This new book, written by Cinnamon Miles of Liberty Jane Clothing, may be the perfect thing to guide you on your journey to learn to sew!
As an added bonus: Cinnamon, Melinda, and Karin worked together to bring you lots of exciting new crafty projects to help you learn the skills taught in the book. One of the favorites is the zippered clutch (pictured below)!
Geared toward the absolute beginner, Idiot's Guides: Sewing  teaches the basics of sewing...

More

]]>

Are you new to sewing? Do you need to learn the basics? Do you want to see what is being taught with clear color photo's? This new book, written by Cinnamon Miles of Liberty Jane Clothing, may be the perfect thing to guide you on your journey to learn to sew! As an added bonus: Cinnamon, Melinda, and Karin worked together to bring you lots of exciting new crafty projects to help you learn the skills taught in the book. One of the favorites is the zippered clutch (pictured below)!


Geared toward the absolute beginner, Idiot's Guides: Sewing  teaches the basics of sewing in a series of lessons using full-color, step-by-step illustrated instructions that enable you to clearly see how every technique is executed, from threading a sewing machine to reading a pattern. The lessons are accompanied by practice projects, allowing you to try out their newly learned skill. As the lessons become more advanced, so do the projects, giving you instant gratification as you become more proficient. This completely illustrated guide is an essential tool for any person who wants to learn to sew.


Projects Included in the book:

Fabric Bookmark, Infinity Scarf, Peter Pan Collar Embellishment (on a tee or tank), Lace Embellished Cami Tank, Fabric Headband, Zipper Clutch, Pleated Pillowcase, Monogrammed Key Fob, Quilted Pot Holder, Pocket Tee, Peppermint Coasters, Elastic Waist Skirt, Mannequin Scissor Holder, Felt Coffee Cozy, Sewing Machine Cover, Pincushion, Tissue Pack Cover, Reusable Snack Bag, Drawstring Flat Pack, Tablet Case, Picnic Blanket, Makeup Brush Holder, Applique Pillow. 


Win A Free Autographed Copy

To enter the giveaway simply leave a comment below answering the question "why I love sewing". Then use the "Giveway" tool to enter your name in the drawing. You can log into the giveaway with either your email address or Facebook profile. 

Please Note: There are a lot of comments being posted, so you must scroll all the way down to the bottom of the pge to find the comment box :)


a Rafflecopter giveaway ]]>
https://larougetdelisle.com/blogs/sewing-tips-resources/8800497-sew-along-the-empire-peacoat 2013-08-26T16:10:59-07:00 2016-06-13T19:26:01-07:00 Sew Along: The Empire Peacoat Cinnamon Miles Empire Peacoat pattern. Enjoy! ]]>